Custom Button Action
January 17, 2022
Introduction
Many automation scripts are triggered by system events, such as Maximo business objects being created or saved, or as part of an integration process, but often we want to take action based on user input. In this post we will look at using an Action launch point to call an automation script based on a user button click.
For our example we will add a button to the Work Order Tracking application that defaults work order data from the current user's labor record. This will include the Work Location, Work Type, and Supervisor.
Create Custom Button
Create Signature Option
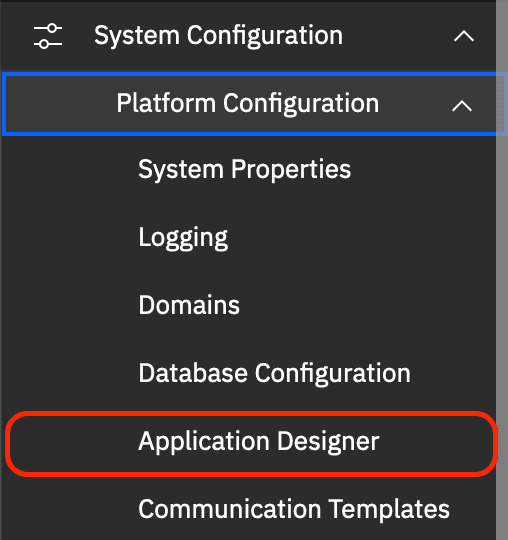
The first thing we need to do is to navigate to the Application Designer application, locate the WOTRACK application and add a new signature option that will trigger our automation script. From the main navigation menu select System Configuration, then Platform Configuration and then select Application Designer.
From the List view, search for the WOTRACK application and then select the Work Order Tracking application record.
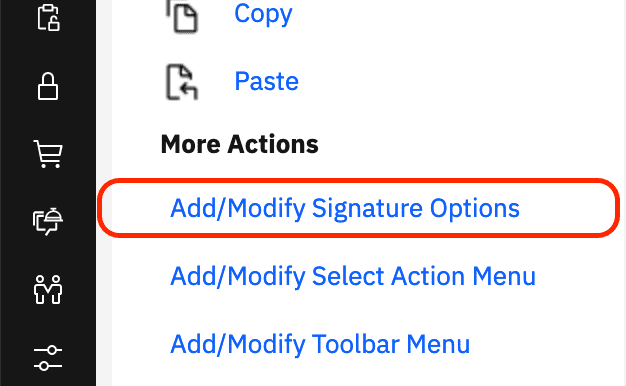
From the More Actions menu select Add/Modify Signature Options.
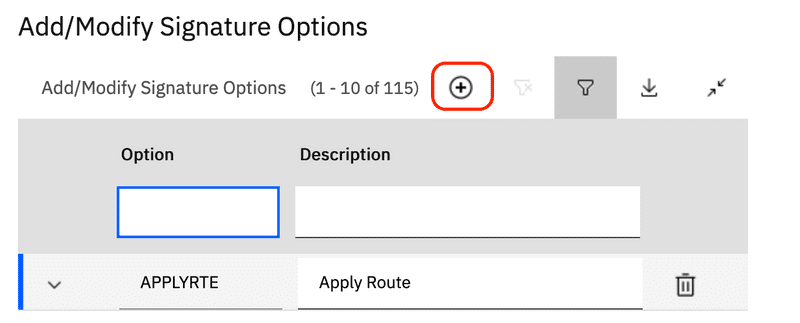
From the Add/Modify Signature Options dialog, click the New Row button to create a new signature option.
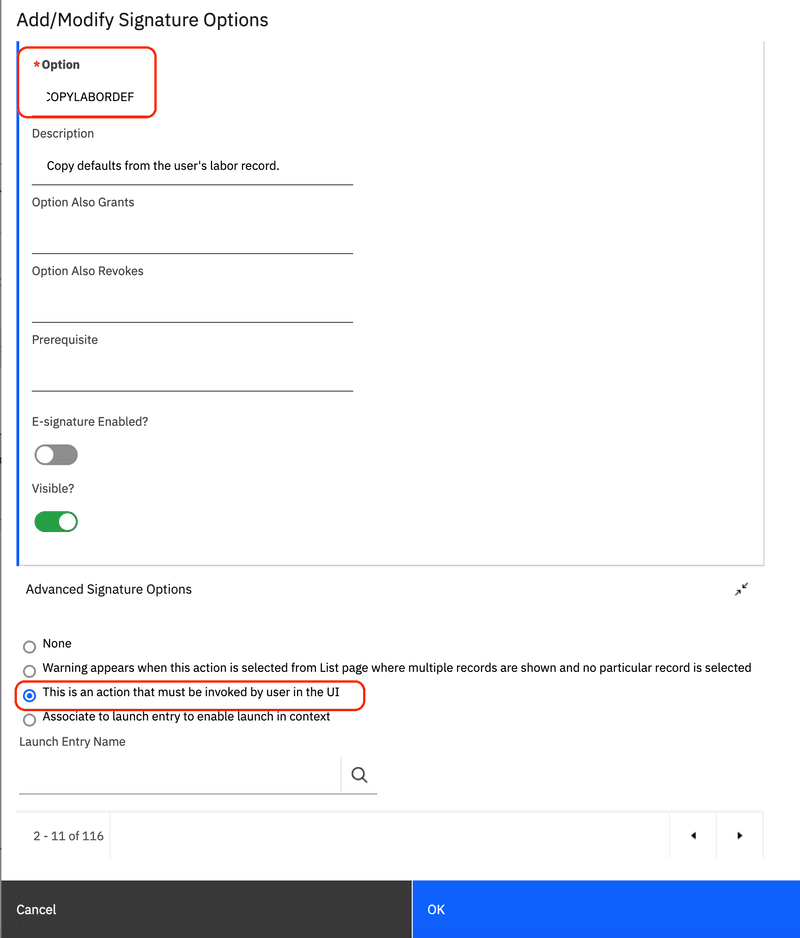
For the Option value enter COPYLABORDEF and for the Description enter Copy defaults from the user's labor record.. Expand the Advanced Signature Options section and then select This is an action that must be invoked by the user in the UI option. This is critical, if you do not select this option the script will not be invoked.
Click the OK button to save the new signature option.
Add Button to Work Order Tracking
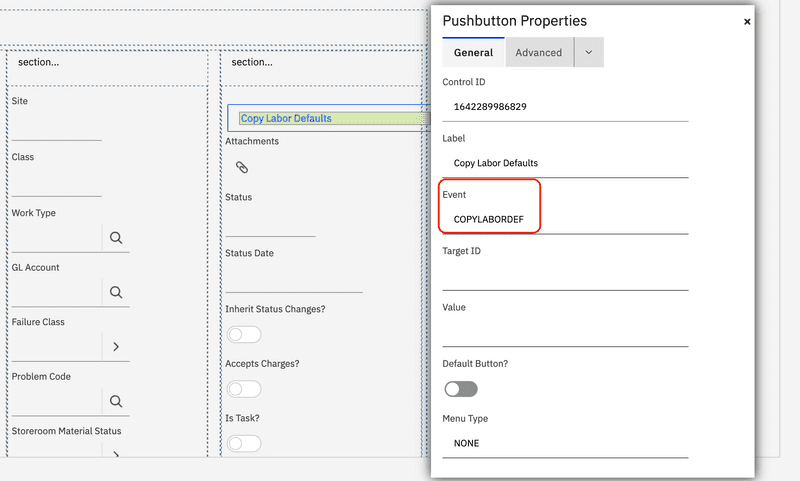
While still on the Work Order Tracking application record click the Work Order tab to view the work order details view. Next, select the Control Palette from the Common Action menu, then select the Button control and drag it onto the screen above the Attachments control. Then right click the button and select Properties to view the button properties. In the Label field enter Copy Labor Defaults and in the Event field enter COPYLABORDEF, note that this is the same as the signature option name enter in the previous step.
Save the record to complete the application configurations.
Grant Signature Option
From the main navigation menu select Security and then select the Security Groups application. Search for the group you want to grant access to this button and then select the Applications tab and search for the Work Order Tracking application. From the the options listed in the bottom of the screen, search for Copy and grant Copy Labor Defaults to the selected group and save the record.
Create Automation Script
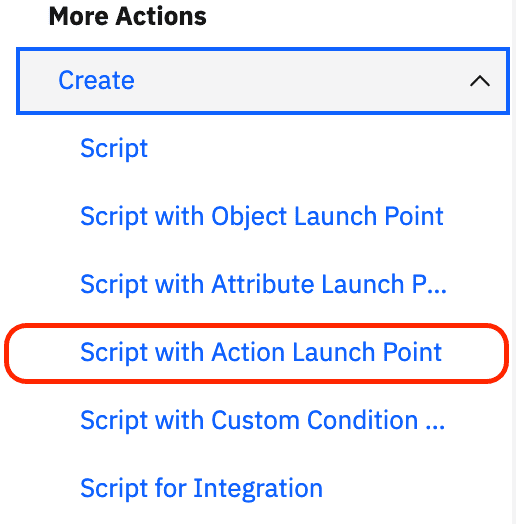
From the main navigation menu select System Configuration, then Platform Configuration and then select Automation Scripts. From the Create menu select Script with Action Launch Point.
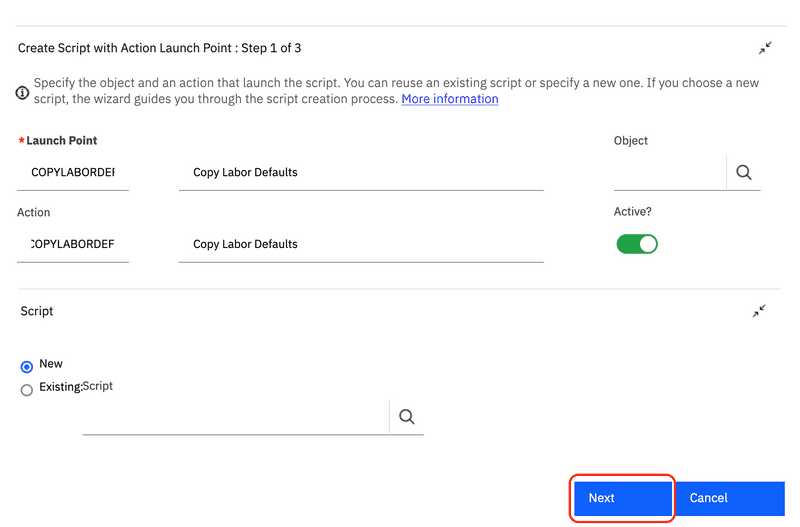
Enter COPYLABORDEF for the Launch Point field, enter a description and enter COPYLABORDEF for the Action field, leave the New option selected for the script and then click the Next button.
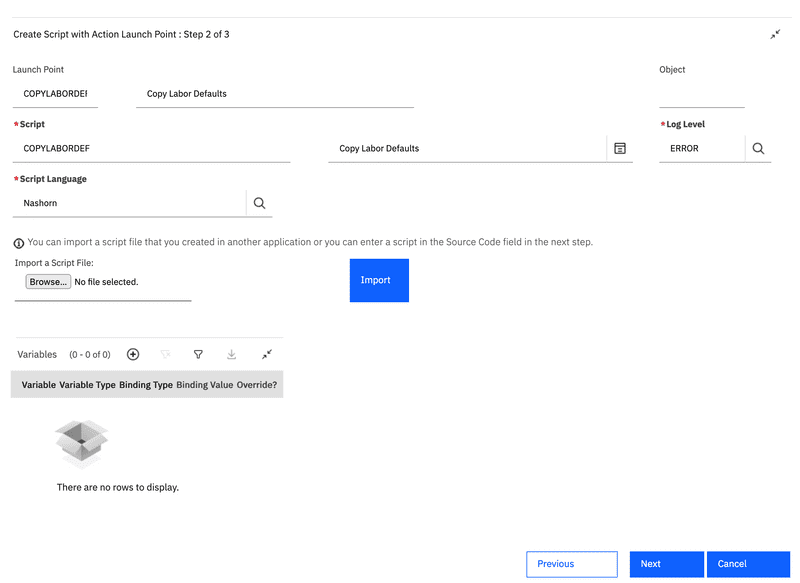
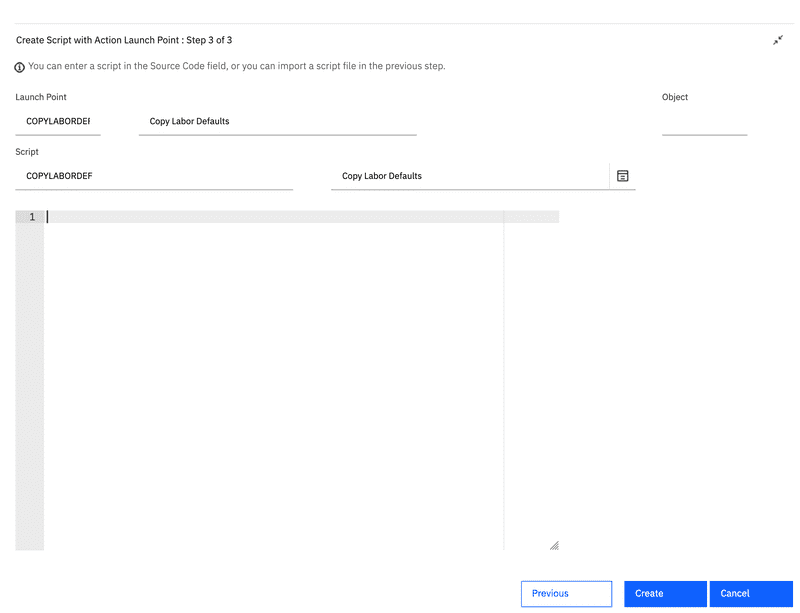
In the next screen enter COPYLABORDEF for the Script value and a description then click the Next button.
In this example we have used
COPYLABORDEFfor the Launch Point, Action, and Script values. This was done for consistency, but only the Action value must match the signature option created in the previous step.
Finally enter the script to trigger when the button is clicked and click the Create button.
When the Launch Point is created a new
Actionapplication record will also be created with a type ofCUSTOM, a value ofcom.ibm.tivoli.maximo.script.ScriptActionand a parameter of the Launch Point, Action, and Script names separated by commas.
Below is the script we developed for this example, note that it provides the scriptConfig for our Visual Studio Code extension to make deploying simple. You can get our Visual Studio Code extension here: https://marketplace.visualstudio.com/items?itemName=sharptree.maximo-script-deploy
MXServer = Java.type("psdi.server.MXServer");MboConstants = Java.type("psdi.mbo.MboConstants");MboSet = Java.type("psdi.mbo.MboSet");SqlFormat = Java.type("psdi.mbo.SqlFormat");main();function main() {// only execute the script if the mbo implicit variable is available and is based on the WORKORDER object.// also only allow this action if the work order is editable by not being in Cancel or Close status.if (mbo && mbo.isBasedOn("WORKORDER") && mbo.getInternalStatus() != 'CAN' && mbo.getInternalStatus() != 'CLOSE') {copyLaborDefaults();}}function copyLaborDefaults() {var personId = mbo.getUserInfo().getPersonId();var laborSet;try {laborSet = MXServer.getMXServer().getMboSet("LABOR", mbo.getUserInfo());var sqlf = new SqlFormat("personid = :1 and orgid = :2");sqlf.setObject(1, "LABOR", "PERSONID", personId);sqlf.setObject(2, "LABOR", "ORGID", mbo.getString("ORGID"));laborSet.setWhere(sqlf.format());// if there is a labor record associated with the current user then copy values.if (!laborSet.isEmpty()) {var labor = laborSet.getMbo(0);// copy the labor work location if not nullif (!labor.isNull("WORKLOCATION")) {// avoid issues with setting the GL or changing the asset location by skipping validation.mbo.setValue("LOCATION", labor.getString("WORKLOCATION"),MboConstants.NOVALIDATION | MboConstants.NOACCESSCHECK);}if (!labor.isNull("TYPE")) {mbo.setValue("WORKTYPE", labor.getString("TYPE"));}if (!labor.isNull("PERSON.SUPERVISOR")) {mbo.setValue("SUPERVISOR", labor.getString("PERSON.SUPERVISOR"));}}} finally {_close(laborSet);}}// use the _ in the name to indicate that this is an internal script function.function _close(mboSet) {// make sure the provided MboSet is defined and is an instance of psdi.mbo.MboSetif (typeof mboSet !== 'undefined' && mboSet instanceof MboSet) {try {// release any pending Maximo transactions.mboSet.cleanup();} catch (error) {// log the error, but there is nothing we can do to respond to it.service.log_error(error);}try {// remove any references and close the underlying JDBC ResultSet.mboSet.close();} catch (error) {// log the error, but there is nothing we can do to respond to it.service.log_error(error);}}}var scriptConfig = {"autoscript": "COPYLABORDEF","description": "Copy Labor Defaults","version": "1.0.0","active": true,"logLevel": "ERROR","scriptLaunchPoints": [{"launchPointName": "COPYLABORDEF","launchPointType": "ACTION","active": true,"description": "Copy Labor Defaults","actionName": "COPYLABORDEF"}]};
Test the Script
Log in to Maximo as a user that has a Labor record and is a member of the group that the Copy Labor Defaults security option has been granted to. From the main navigation menu select Work Orders and the select the Work Order Tracking application. Select a work order that is editable and then click the Copy Labor Defaults button to apply the current user's labor record Work Location, Work Type, and Supervisor values to the selected work order.
Conclusion
In this post we reviewed creating an action launch point that is trigger by clicking a button on the Work Order Tacking application. We created the security option in the Application Designer application, add the button to the Work Order Tracking application and then set the Event to be the same as our Action Launch Point action name. Finally we granted access to the Copy Labor Defaults security option and created our Action Launch Point script to tie it all together.
If you have any questions or comments please reach out to us at [email protected]
